
So I started searching for other patterns and ideas. I purchased two other patterns and planned to make either or both at various times over the last year. The first was the Ultimate Art Organizer bag. I really liked the pencil holder and all the various ways to customize it. There are pages of ones people have made with all sorts of great ideas for holding sewing feet, needles, note pads, even one using chalkboard fabric. But I wanted it to be able to stand up on the table. Many of the photos were done that way but with the materials used, it really wasn't rigid. Would it get too heavy with all the tools I was going to put in it and collapse? I also worried that each section was too skinny for what I wanted to put in there as they were only as thick as the zipper.

Then I found this one called Tooly tool holder/travel case. I liked the easel idea a lot but worried that things would fall out when closed up, plus where would I put bobbins, sewing feet, etc. The pattern had little wings that folded over but what about the back? That seemed like wasted space.

After thinking and thinking and thinking and searching for months, I finally smacked my head and thought, duh woman, come up with your own using the best of all these other patterns. Sewing it wouldn't take near as much time as I had spent thinking about it.
I knew I wanted to store a small calling mat so that gave me the overall minimum dimension. My first step was to sew the pencil holder section. I like how the elastic on the bag I made held all the pencils separately (vs Tooly) but I also liked the pocket idea so I combined them. First lesson learned was even when you think the length of fabric is plenty long, make it longer just in case. It's much easier to cut off the extra than have to add more. As it turned out I needed about an inch, so I made the last pocket larger for the rotary cutter, then sewed another piece of fabric to cover the raw edge. This section then became the front of a larger pocket, which I subdivided to hold a small ruler and scissors. Then behind those was the storage for the cutting board.
I loaded up the tools then taped it to a piece of cardboard to see how it worked. Second lesson, I should have made the spaces for the marking tools a little larger. Once the scissors were loaded, a few of the pencil slots are a little snug, but still workable. I just have to be careful which pencils I put in which spots. The weight of the tools also pulled down and made the cutting mat pocket gape, so I added a tab with Velcro to pull it back up straight. I also found that roll of chalk fabric that I bought 20 years ago but never used and added a strip above the scissors. Not 100% perfect but pretty darn closed. I chose some fun zigzag fabric I had purchased for binding a while back, pulling coordinating fabrics from my stash. Plus the zigzag hides my splicing pretty well. Here is the bottom section with the Velcro tab folded down.

Next, what did I want on the back? I knew that when I was at home, I wouldn't be using the back section, but on trips I wanted to store bobbins, machine feet, needles & measuring tape; small things of various sizes but they aren't flat. And I wanted to be able to see what was there easily. One thing I hadn't liked about the quilter bag was I could never remember which pocket contained what. I had recently made a project using thin vinyl that was pretty easy to work with. So I made 3 little clear zippered bags of graduated sizes with Velcro on one side. That way I could hang them on the back side at the retreat, but leave them off when not needed. I love Velcro! What did we do before Velcro! I even had some bright 2 sided Velcro that coordinated with the zigzag fabric and the colorful zippers.

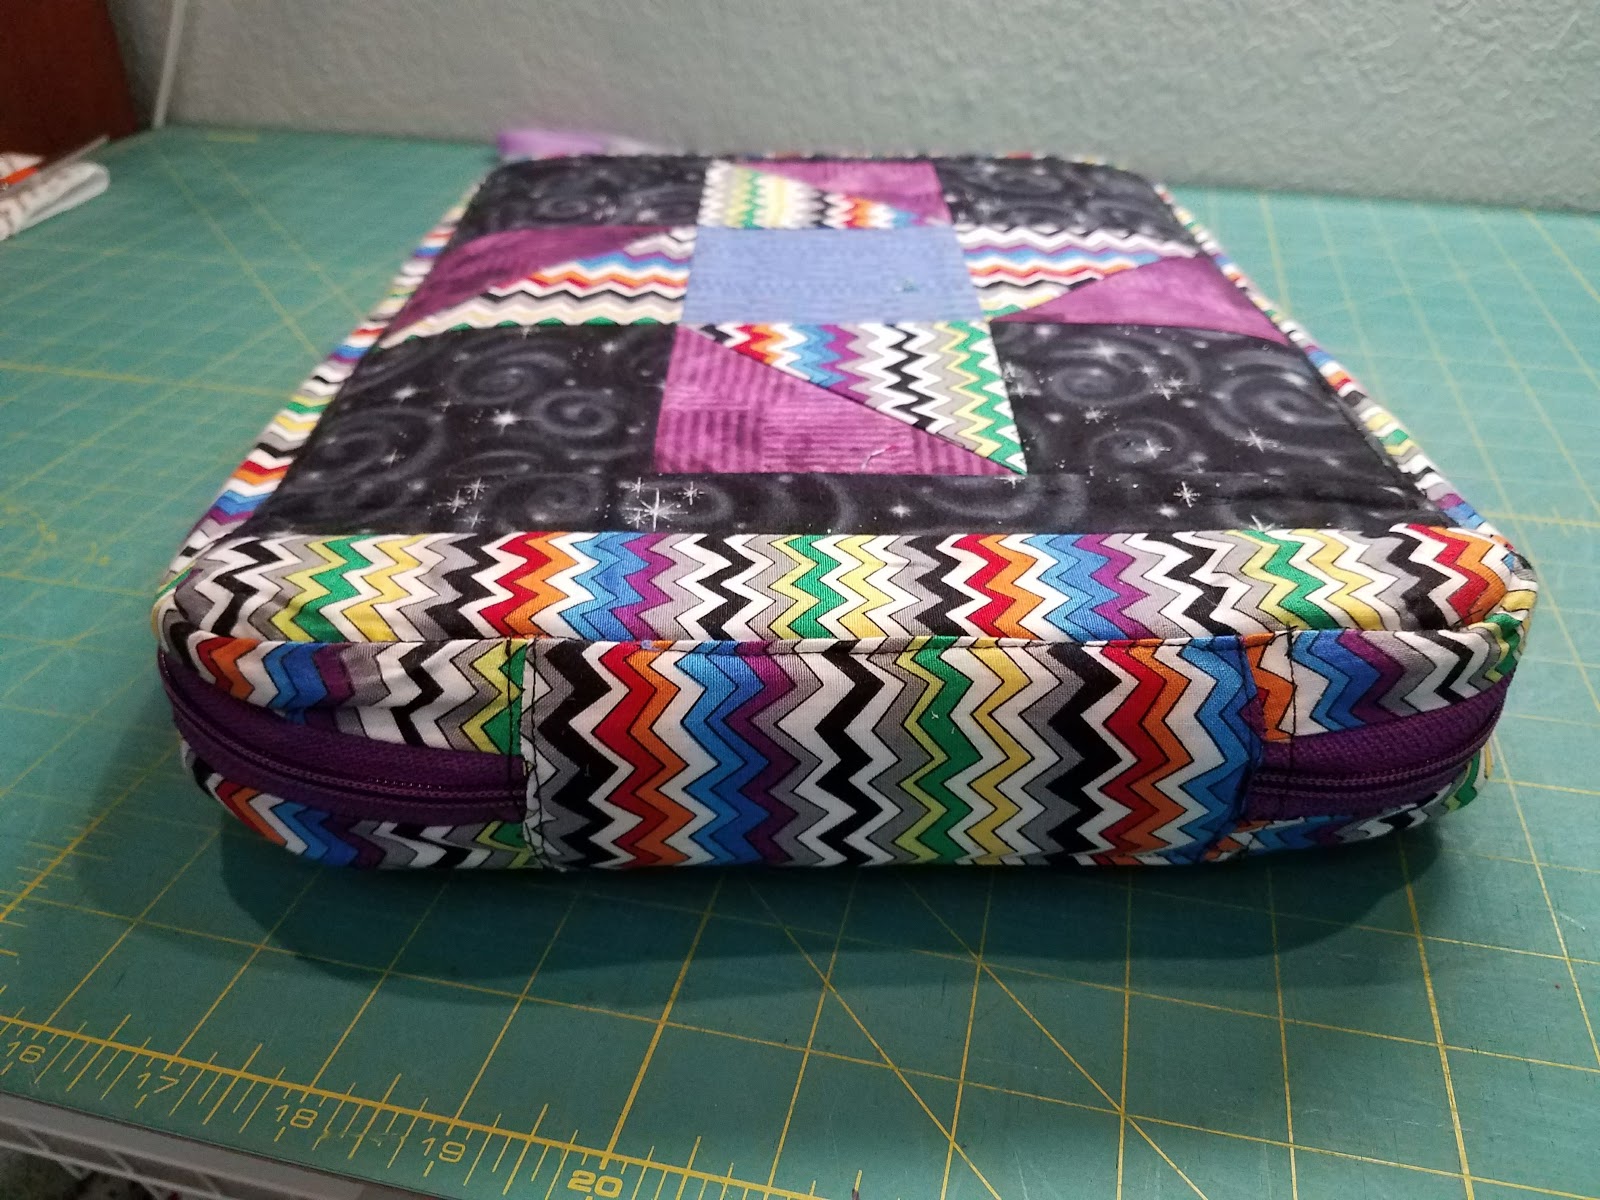
I had reinforced the backing fabric on each section with left over strips of fusible interfacing that I have in abundance from making t-shirt quilts. Now what to put on the outside of the caddy? I didn't want to make it too complicated but I am a quilter and couldn't pass up those two big surfaces. I decided on a simple friendship star block. I fused foam to the back of each as I liked how the foam looked on the Ultimate Art organizer bag. It's pretty cool stuff. I was able to use it on the hinge later and having it fused was very helpful. Here are the outside pieces. 
I wasn't completely sure how I was going to do the hinge so I left extra fabric on one end, just in case I needed it. I sewed the inside and outside pieces together and slid in a piece of hinged card board into try standing it up, easel style. It worked great. Now to finish the edges.
I really liked how the ultimate art organizer bag zipped closed to keep everything inside when traveling. I had ordered purse zippers from the pattern designer as I needed a very long one to go all the way around (40") and she had great selection. I loaded up the tools again (I've done this about 20 times now) and attached the clear bags with their contents. But when I closed it I realized even though the purse zippers were wider than normal zippers, they weren't going to be near wide enough. I also didn't like how her directions had you sew the zipper in like on a pillow case, requiring you to turn it inside out. My sections were way too stiff and thick for that. I decided to sew extra fabric to extend the sides of the zipper, then add another piece that I would fold over and sew down over the raw edge, similar to how a binding is attached.
I did add a hinge similar to how the art organizer instructions indicated but didn't make a complete circle until it was attached, again a lot like a quilt binding. I even glued the zipper down before sewing which I often do on bindings, which was very helpful when turning the curved corners. I had examined how my bible cover was done and decided a curved corner would work best. However it posed problems when it was time to sew the "binding" down. I was able to machine stitch on the straight parts but on the curves I had to hand sew (nor yet done in the pics below.
Here is the carrier with the cardboard support inserted and fully loaded. I made a small blue pin cushion which attaches with Velcro on the front for use, then moves to the back for storage. The black section above the scissors is chalkboard fabric for jotting notes.

Here is the back with the clear bags loaded

This shows the carrier laying flat, with the pincushion moved and the small ironing pad attached for storage. It helps to hold the bags in place while closing.


Here you can see the other side of the ironing pad. Love that fabric.

I'm sure as I use it over the next few weeks I'll think of things I might have done to improve it. Figuring out how to sew the zipper on the curves and how to insert the cardboard support was challenging and a bit messy, nothing to be proud of and nothing I would try to describe to someone else. But I think it will work well both in my sewing room and on trips. And it was fun using my sewing skills to make something configured just the way I wanted.