Tuesday, February 24, 2015

A Very Fun and Productive Weekend

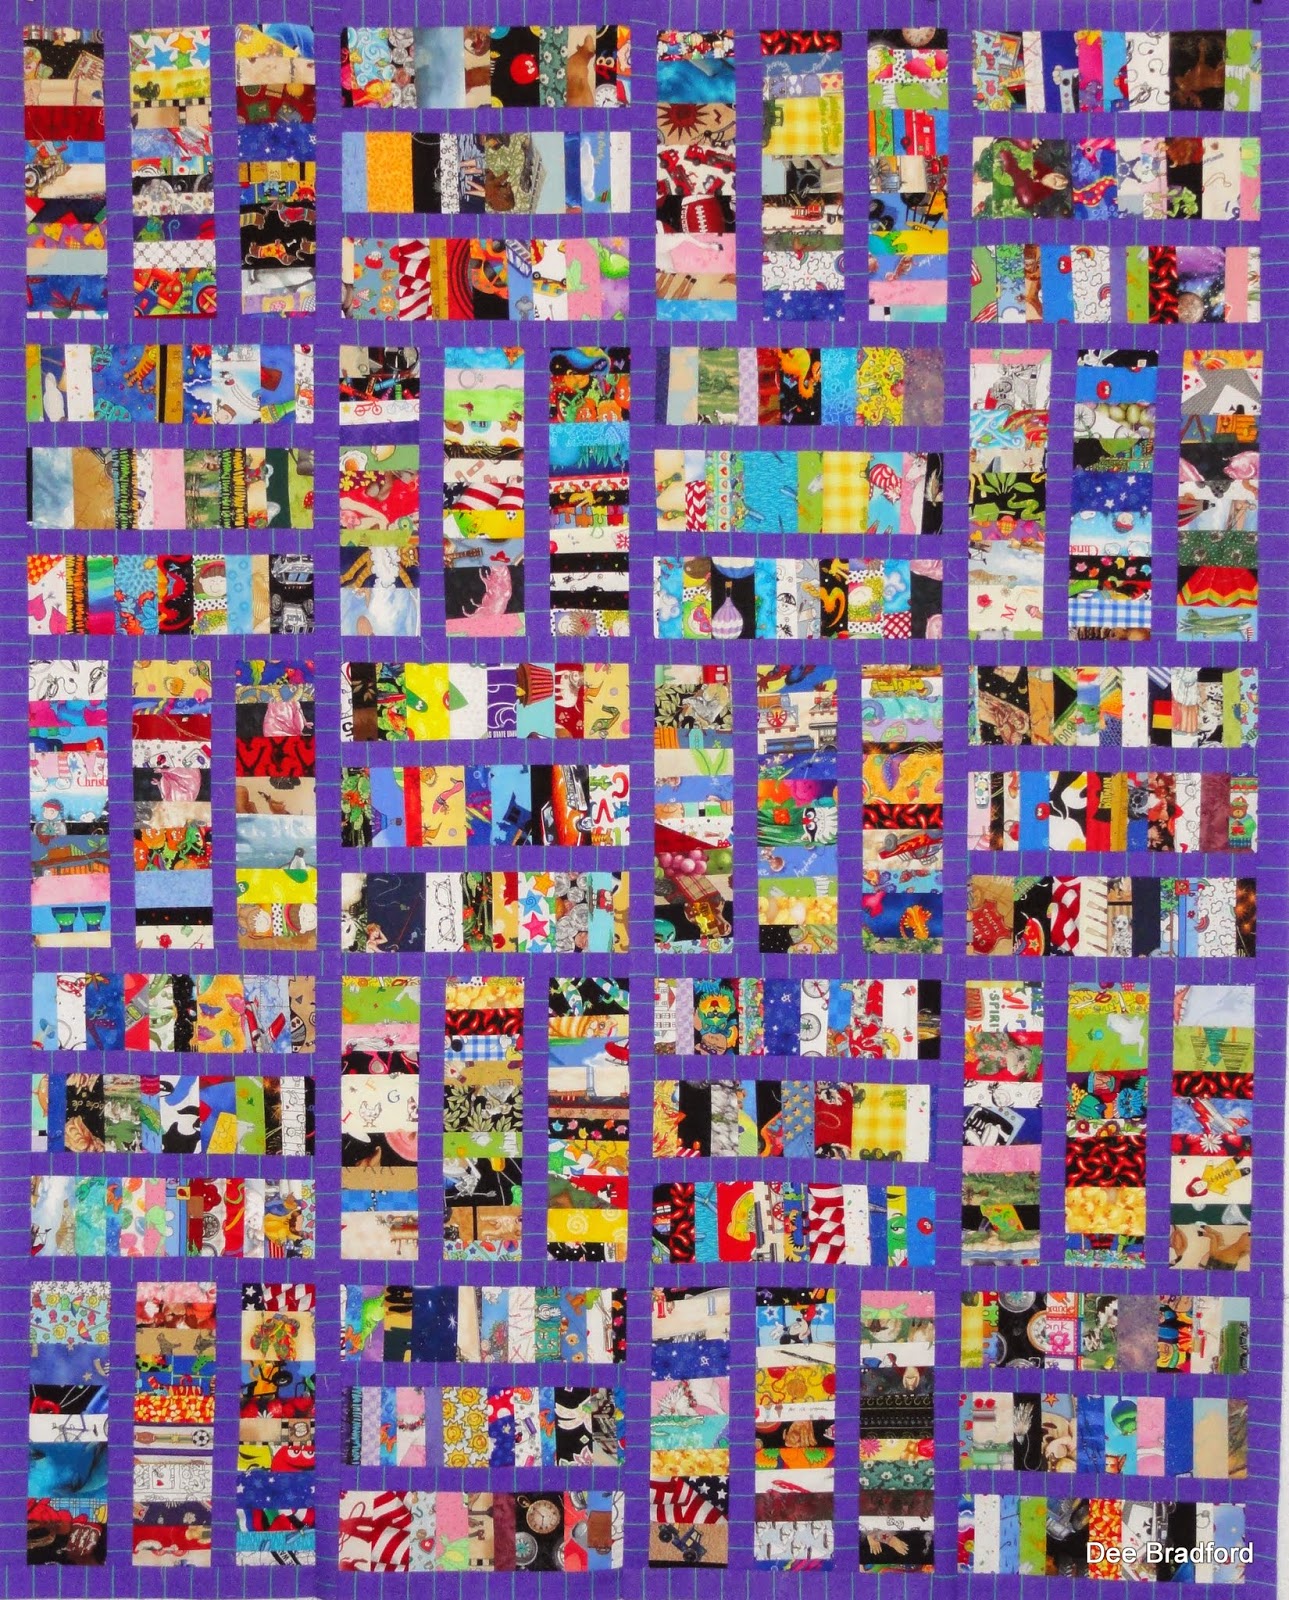
Each February for the last 9 years I've attended a quilt retreat in Phoenix hosted by a group of ladies from the About.com quilt forum.  It is a wonderful time of laughter, visiting, and sewing.  I start preparing for the retreat around Christmas time, often putting together kits to work on while I'm there.  I like working on kits because all I have to do is sew.  I don't have to think too hard or worry about following instructions or cutting fabrics.  I do all the prep work, planning, and cutting ahead of time.  I worked on 3 kits while I was there, finishing up one that I started at home, completing another, and constructing the blocks on the 3rd.  All 3 are now finished tops.

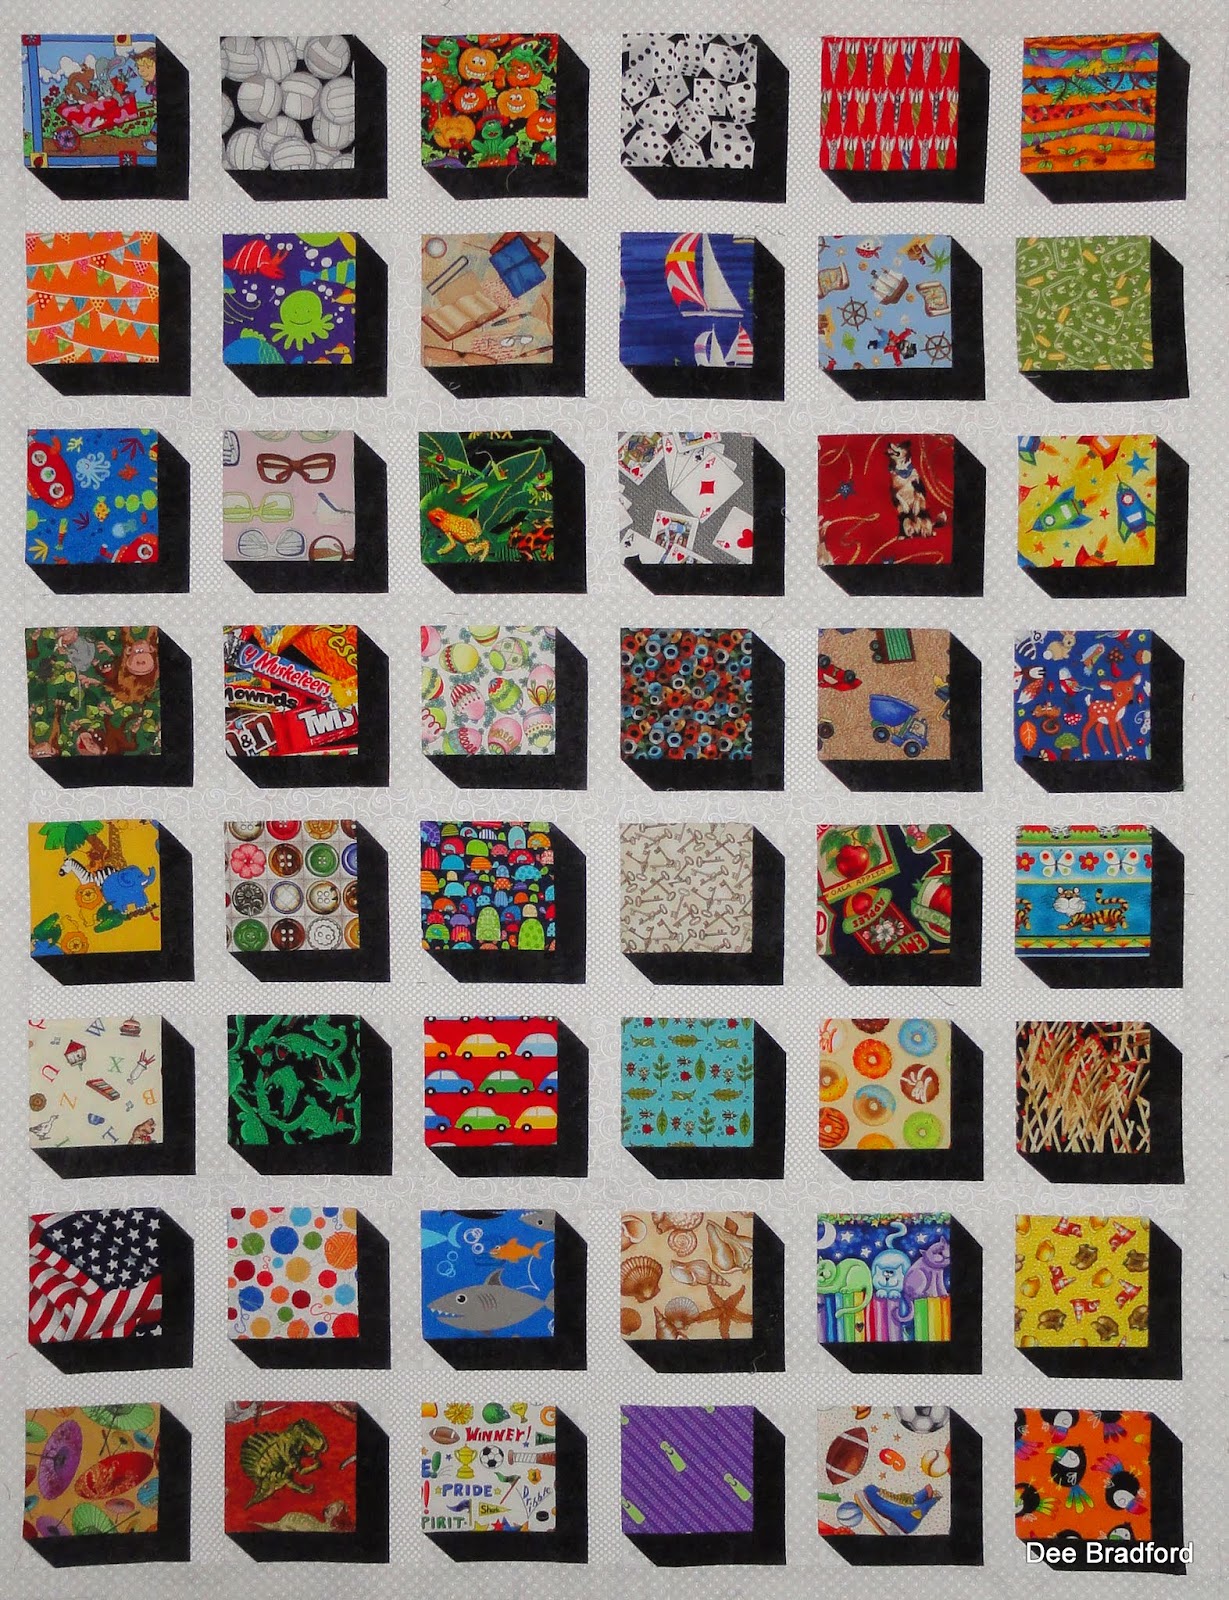
The first is a modified shadow box.  I had seen the pattern in a Connecting Threads catalog.  I realized it was very similar to the floating shadow box I had previously made except instead of a square in 2 corners, it has a small triangle.  I made the block by sewing the black strips to the center, then adding the triangles using the Perfect Corner ruler.  It went together very quickly.  I love optical illusions and this really looks fun.

3-D Blocks

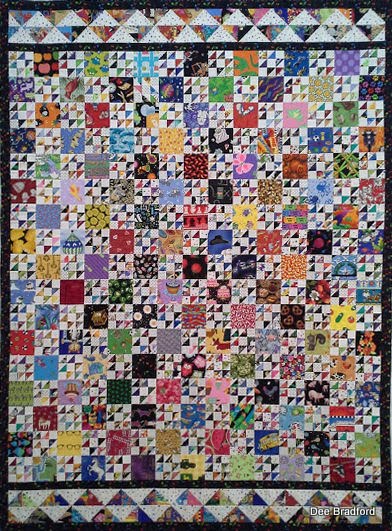
The idea for this quilt came from a friend who also attends the AZ retreat.  She had made the pattern using hot pink and blue with a large focus print which was very striking.  The pattern is from Quilterscache.com, called Snowball and Nine Patch, which is exactly what it is made of.  I sewed this one entirely at the retreat, taking about 6 hours.  The secondary pattern is wonderful.

 
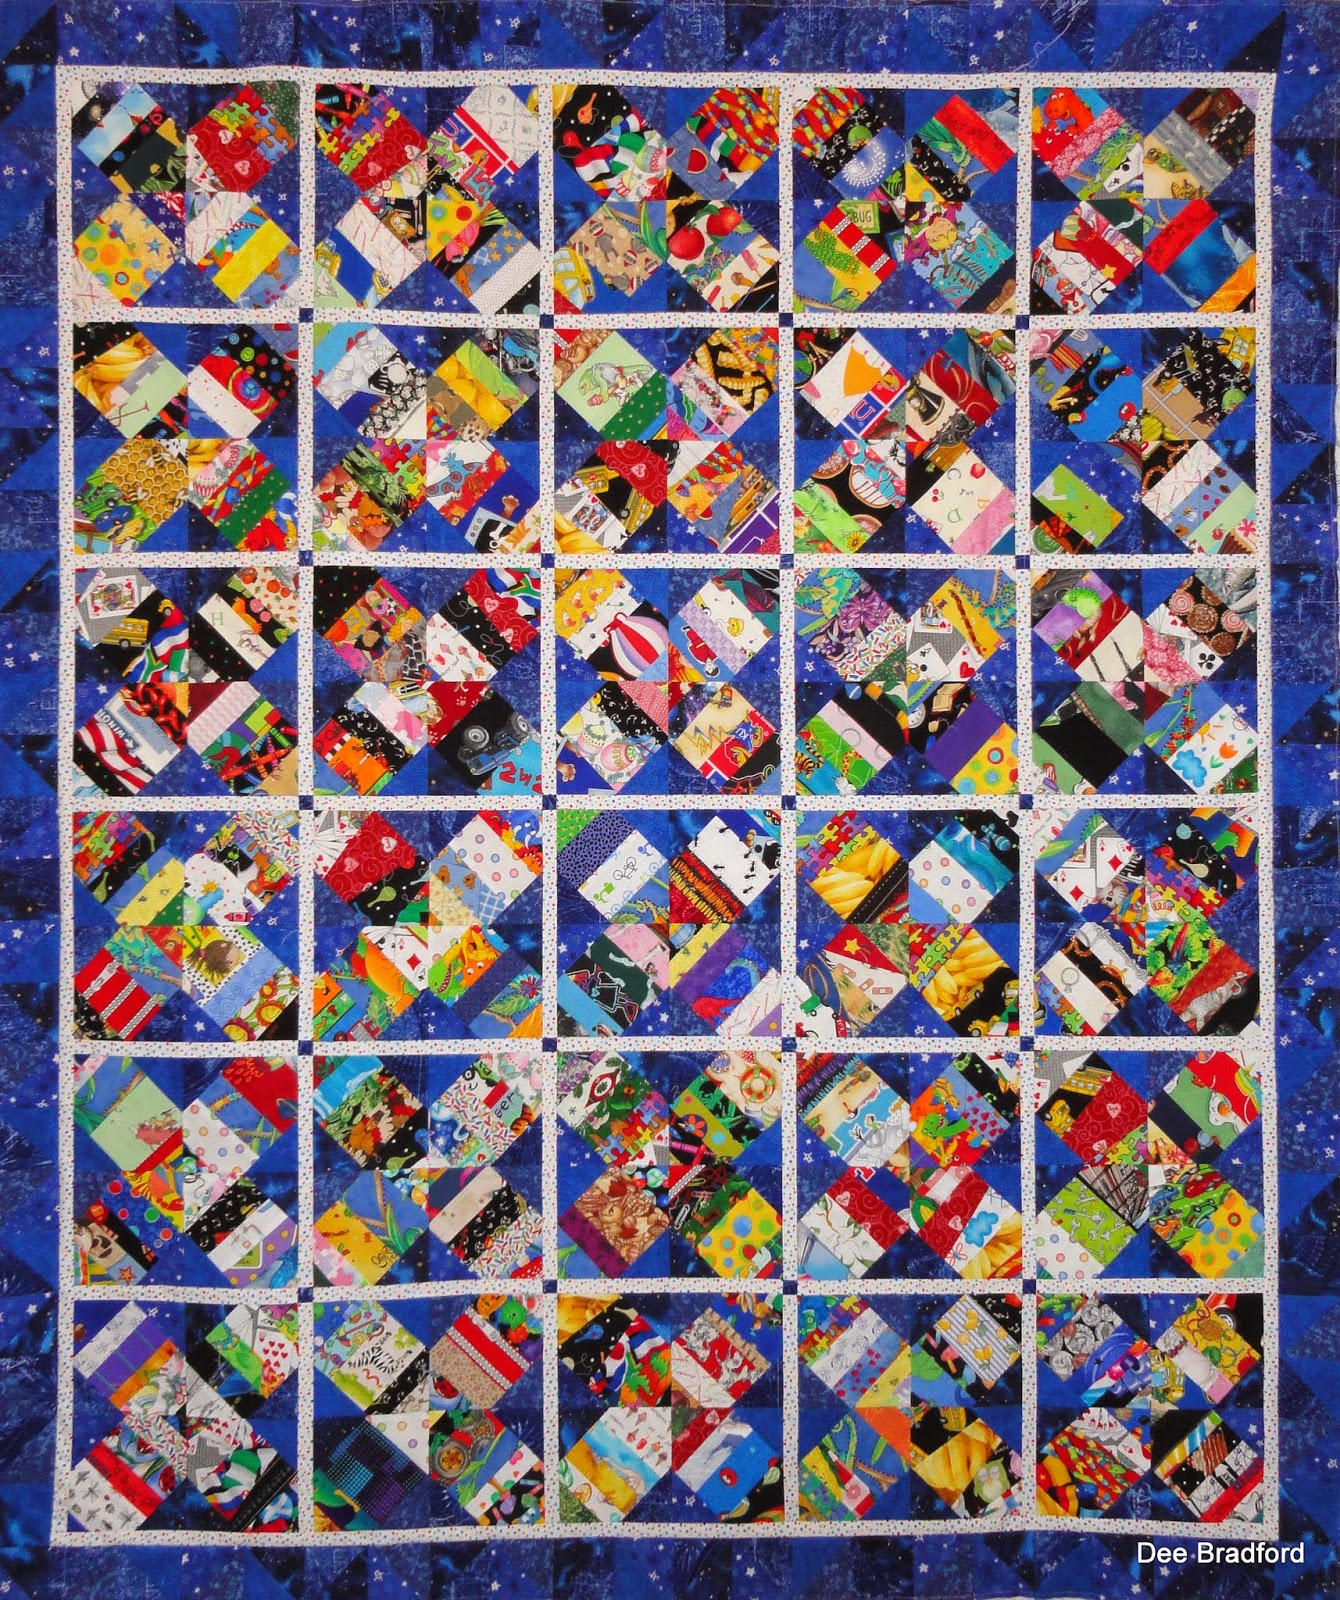
The inspiration for this last quilt was from another forum member who had made one in bright colors and photographed it in the sunshine.  It's called Twinkling Stars and her photo did twinkle.  I had to give it a try in novelties.  At first I was going to use different fabrics of the same color in each star, but decided that would be distract too much from the star pattern.  As well as very time consuming to select the fabrics.  So I stuck with one fabric for each block, using fabrics with small scale.
 
 
I get a lot of teasing at the retreat about finishing so many quilts, but I really am cheating.  By having all the prep work done ahead and using relatively simple patterns it makes my job very easy and frustration free.  And then I can focus on enjoying the time visiting with friends.  The weekend always goes too fast despite staying up late.  I can't wait until next year.


Tuesday, February 10, 2015

Getting Rid of Some of those Scraps

Whenever I'm cutting fabric for an I Spy quilt, I try to make the best use of the fabric while still getting the picture more or less centered in the block.  The result is quite a few scraps.  I don't keep very small pieces but if they are at least 1" wide and 4" long, I toss them in a small scrap basket.  When it's over flowing (about twice a year) I go through and sort the scraps.  4.5" x 3" or 2.5" I set aside.  The smaller pieces I make into piano key strips.  I've used A LOT of piano keys over the years.

Getting Close
Most often the piano key strips end up as borders, frequently mixed with some coordinating TOT's.  Typically the smallest pieces are 1.5" x 3.5" though sometimes I'll put 2 pieces together if I just can't stand to throw them away.  This example shows some of the wedges left from using the tri-rec rulers.  The narrow little pieces can be interesting.  I don't trim before hand but just start sewing.  I try to keep the pieces roughly straight with the top edge even.  Once I have a strip sewn about 3' long, I'll press and trim even on both sides.  Typically they are 3.5" wide.  I'll roll then up and store until needed for a border or a pattern.

One of my favorite patterns to use up these strips is the Frugal Patch from quilterschache.com.  I modified it so that the piano keys are the sashing rather than the center of the block.  This allows me to put a novelty in the very middle.  I've made this quilt several times now.  I also used it to illustrate a square in a square in a previous post.  In this example I also used novelties in the setting triangles and mixed in the narrow border colors in the piano keys (orange and yellow).

Frugal Patch
This version of Frugal Patch uses pink TOT piano keys left over from another quilt.  The color choices and the black setting triangles make it look completely different.


This quilt is made almost entirely of piano keys.  It was inspired by the pattern Sugar Pop N Change by Melisa Corry of Happy Quilting.  I was using a bigger scrap basket back then.  I think this was at least a year's worth of scraps.


This quilt is also made of piano keys but I cut them into blocks on a diagonal and added blue triangles on the corners.  My friend Misha from About.com's quilt forum suggested this when I was asked for alternate idea to just using them in borders.  The pattern came from Quiltville.com.  Funny thing is I just realized I had printed that pattern out years and years ago, but didn't realize it was the same one until just now.  Anyway the blue triangles got kind of lost in among the piano keys on this so I added the narrow white sashing and tiny corner stones and some more blue triangles in the borders.  I liked the result so much I kept this one for myself, it's hanging in my office at work.  This quilt was a series of happy experiments.  Some times they work, sometimes they don't.  This one did.


Another quilt made Almost Entirely from piano keys is this Ladder Quilt (pattern by A Quilter's  Lumberyard). The original pattern called for a 2 x 4 pieces in the center but I already had a bunch of smaller pieces so I sorted them into color groups and used them instead.  With the piano key border this one used a lot of scraps too.  Looking at this one now I think it needed something to unify it better but I just couldn't come up with a border that worked.  So it got the piano keys treatment.  The little boy who received this quilt had just gotten twin siblings.  His dad tells me he still plays with the quilt and it is one of his special bed time blankets.

For the scraps 2.5 or 3" x 4.5" I've made a column pattern (see my first post).  Here is another more recent example.  This one is much busier and I'm not sure but I think I like my earlier effort better.  The striped fabric in the sashing is too much, but I had been trying to use that in a quilt somehow and I was determined.  I need to give up and just making binding out of it.

For 3" x 4.5" scraps I've used this woven pattern several times using different colored sashing strips.  It goes together quickly but I discovered getting that 1/4" seam scant is very important or you don't end up with square blocks.  And there are more piano keys - eeck!


This recent quilt was made from 2.5" x 4.5" scraps and 2.5" white TOT squares.  The pattern was a free gift in a mailer from American Patchwork & Quilting Magazine, designed by Kathie Holland.  I threw the advertisement away but kept the pattern.  It was very fun to do and I'm itching to do another one in the near future.  I did cut a few additional 2 x 4's because I wanted some brighter colors but it sure went together fast.

Now and Later scraps

 Overall, using up scraps is a big part of quilting.  We all hate to throw those little bits away.  I've tried to use some discipline and only keep the ones I know I'll use.  Mostly.  I still have those 3 bags of bonus triangles remaining after my Triangle Madness.  Someday inspiration will strike and we'll all be amazed.  Ha.   

Triangle Madness


Monday, February 9, 2015

Fun with Colors, Fun Fun Fun

I've referred to this planned post so many times previously I figured I better stop talking about it and just do it.  A little over a year ago I started my usual push to get kits put together for the quilting retreat in AZ.  I had collected a few ideas for zigzag and chevron quilts and, as previously mentioned, one thing leads to another in my world.  What resulted is a group of quilts that turned out so bright and happy that I just love to look at them.

Novelty Diamonds
But first I wanted to talk about a couple of earlier quilts that grouped fabrics by color.  This particular quilt was inspired by my quilting friend Pirate.  As I recall we were talking on the about.com quilt forum about using the various rulers purchased over the years.  Shelley had used her tri-rec ruler (or similar) to make a white and yellow quilt of diamonds.  I got to thinking, hmmm, I could do that with novelties.  This is the result.  The point of the quilt was the diamonds but I wanted to maximize the number of fabrics so instead of using one fabric for the top and the bottom I tried to match the colors.  Some are better than others but it still turned out well.  The only problem was all the weird scrap shapes left over.  I did eventually put them together to make some interesting piano keys.  I like the overall effect but it was a little fiddly to make so it probably won't be repeated.  I donated this one for a United Way raffle at work and was pleased that a good friend won it.
Wiggly Colors
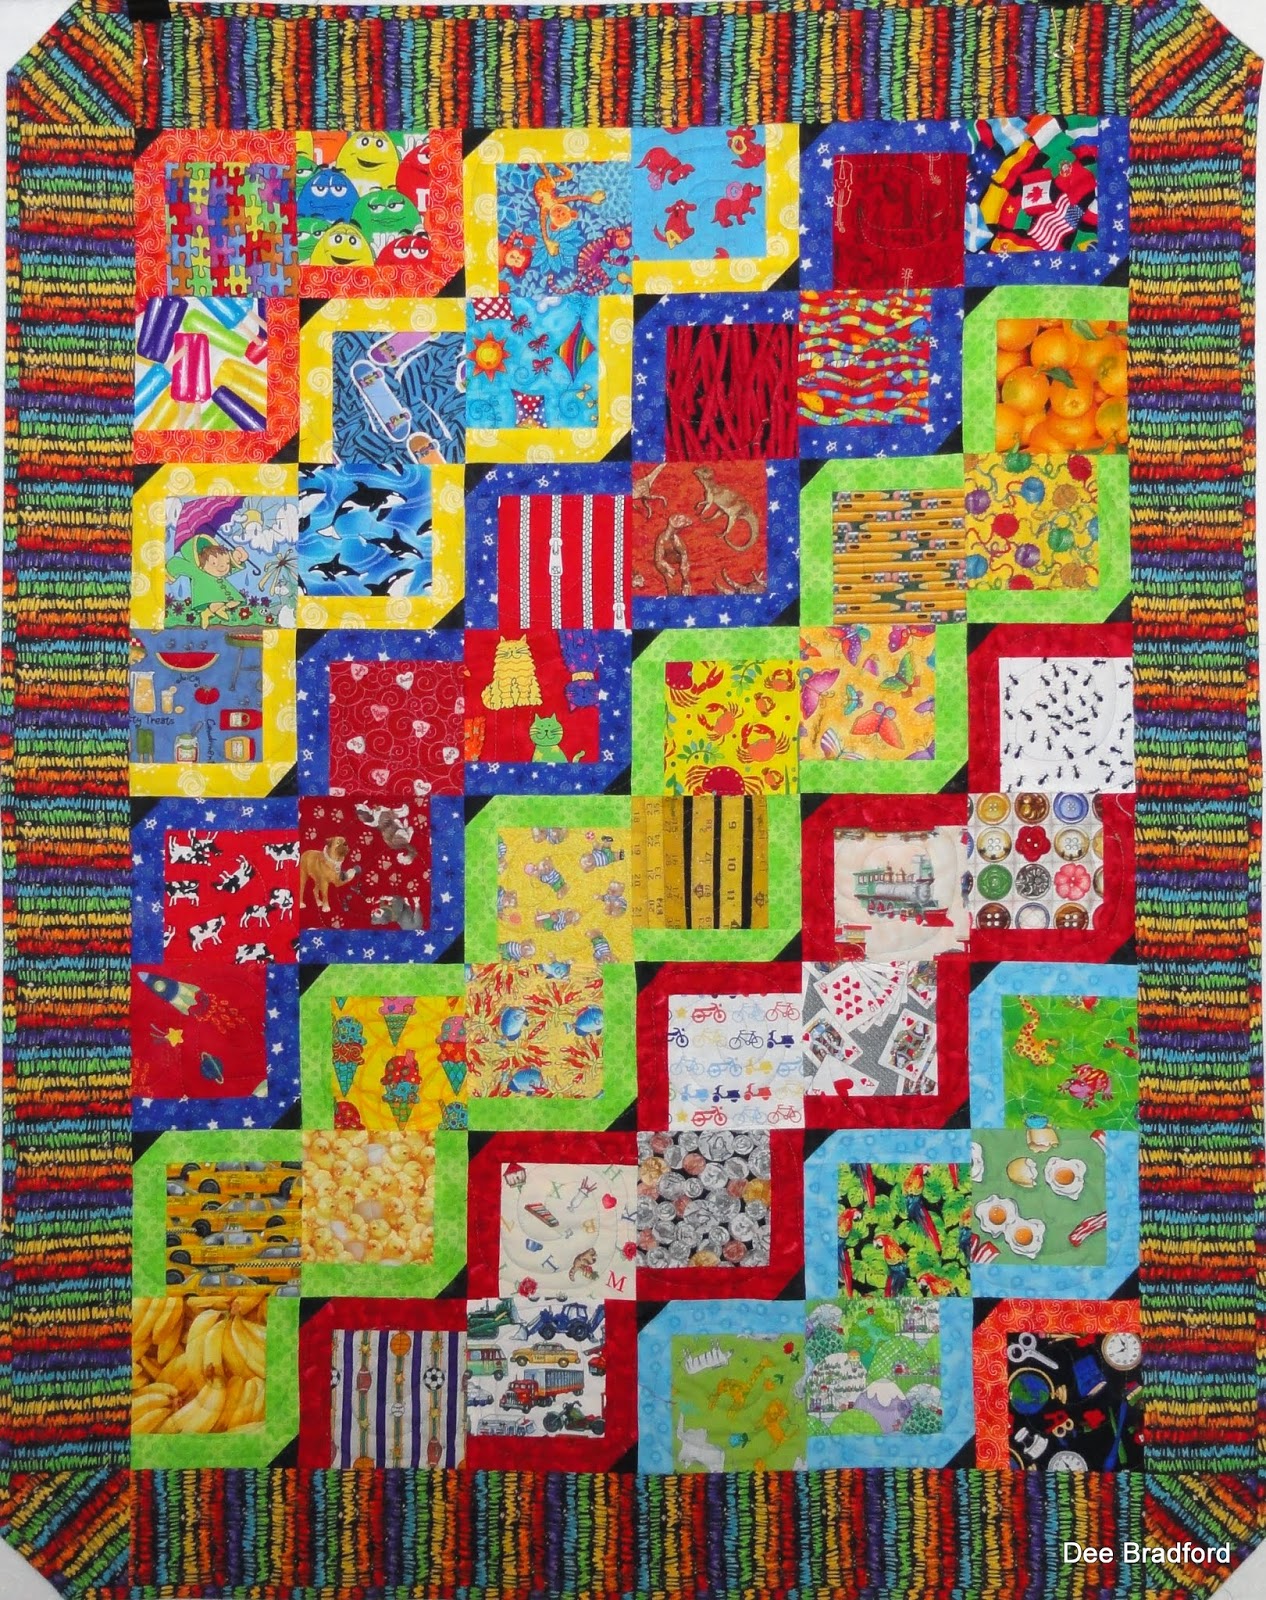
 This was a zigzag quilt inspired by a pattern someone posted on About.com's quilt forum where the zigzags were supposed to be snakes.  The pattern even had snake heads appliqued.  I didn't go that far but I did  like the idea of grouping the colors.  I ran out of the border fabric, thus the clipped corners.  This one seems too busy to me now and the border didn't add anything.  The later efforts work much better.  (Note, the original pattern is Wiggly Worms from Country Woman magazine).


Jelly Beans
Four Patch Fun.  It isn't zigzag or chevron but it does group the fabrics by color.  This quilt was very fun to make.  And it turned out great.  Not only did I match the novelty blocks, I also went through my tone on tone stash to find fabrics to match.  The black and white 9 patch really makes this quilt very striking.  My only regret is that the person who I gave it to does not want to use it but wants to "save it".  I think they were hanging it on the wall, so at least the little one can look at it.  Oh well, once it's given away it's not my worry any more but I do wish they would use it.  Maybe their little girl will be strong willed enough to take it down on her own.  The original pattern was designed by Melissa Corry at happyquiltingmelissa.blogspot.com.

Lumberyard Challenge Color Stripes

More 4 patch fun.  You have to look closely but this quilt is also made with 4 patches.  4 patches are so forgiving.  The only tricky part was making sure I got the TOT colors in the right place.  The design wall was a lifesaver on this one.  I made this quilt as part of a challenge for the 2014 AZ retreat and it won first place!  Of course everyone knew which quilt was mine because I am the official queen of novelties.  The colors are so bright and cheerful and the pattern was very easy.  No idea where this idea came from, I think I was thinking of some other way to use tone on tones with the novelties and the rules of the challenge were it had to use 4x4 and 2x2 pieces.

Novelty Chevron
Chevrons are so popular everywhere lately.  Clothes, home dec, quilts.  The idea for this one came from Endeavor by Freckled Whimsy.  I wanted to try using those silly tri-rec rulers again (more weird scraps).  I didn't have enough orange to make an orange section but the yellow and red add some warm colors.  Sewing this was a little strange because I was combining two large triangles before adding the spikey edges.  The tri-rec rulers aren't really designed for that, so I had to improvise a bit.  And let go my mild OCD tendencies and just live with the less than exactness.


Color Stair Steps
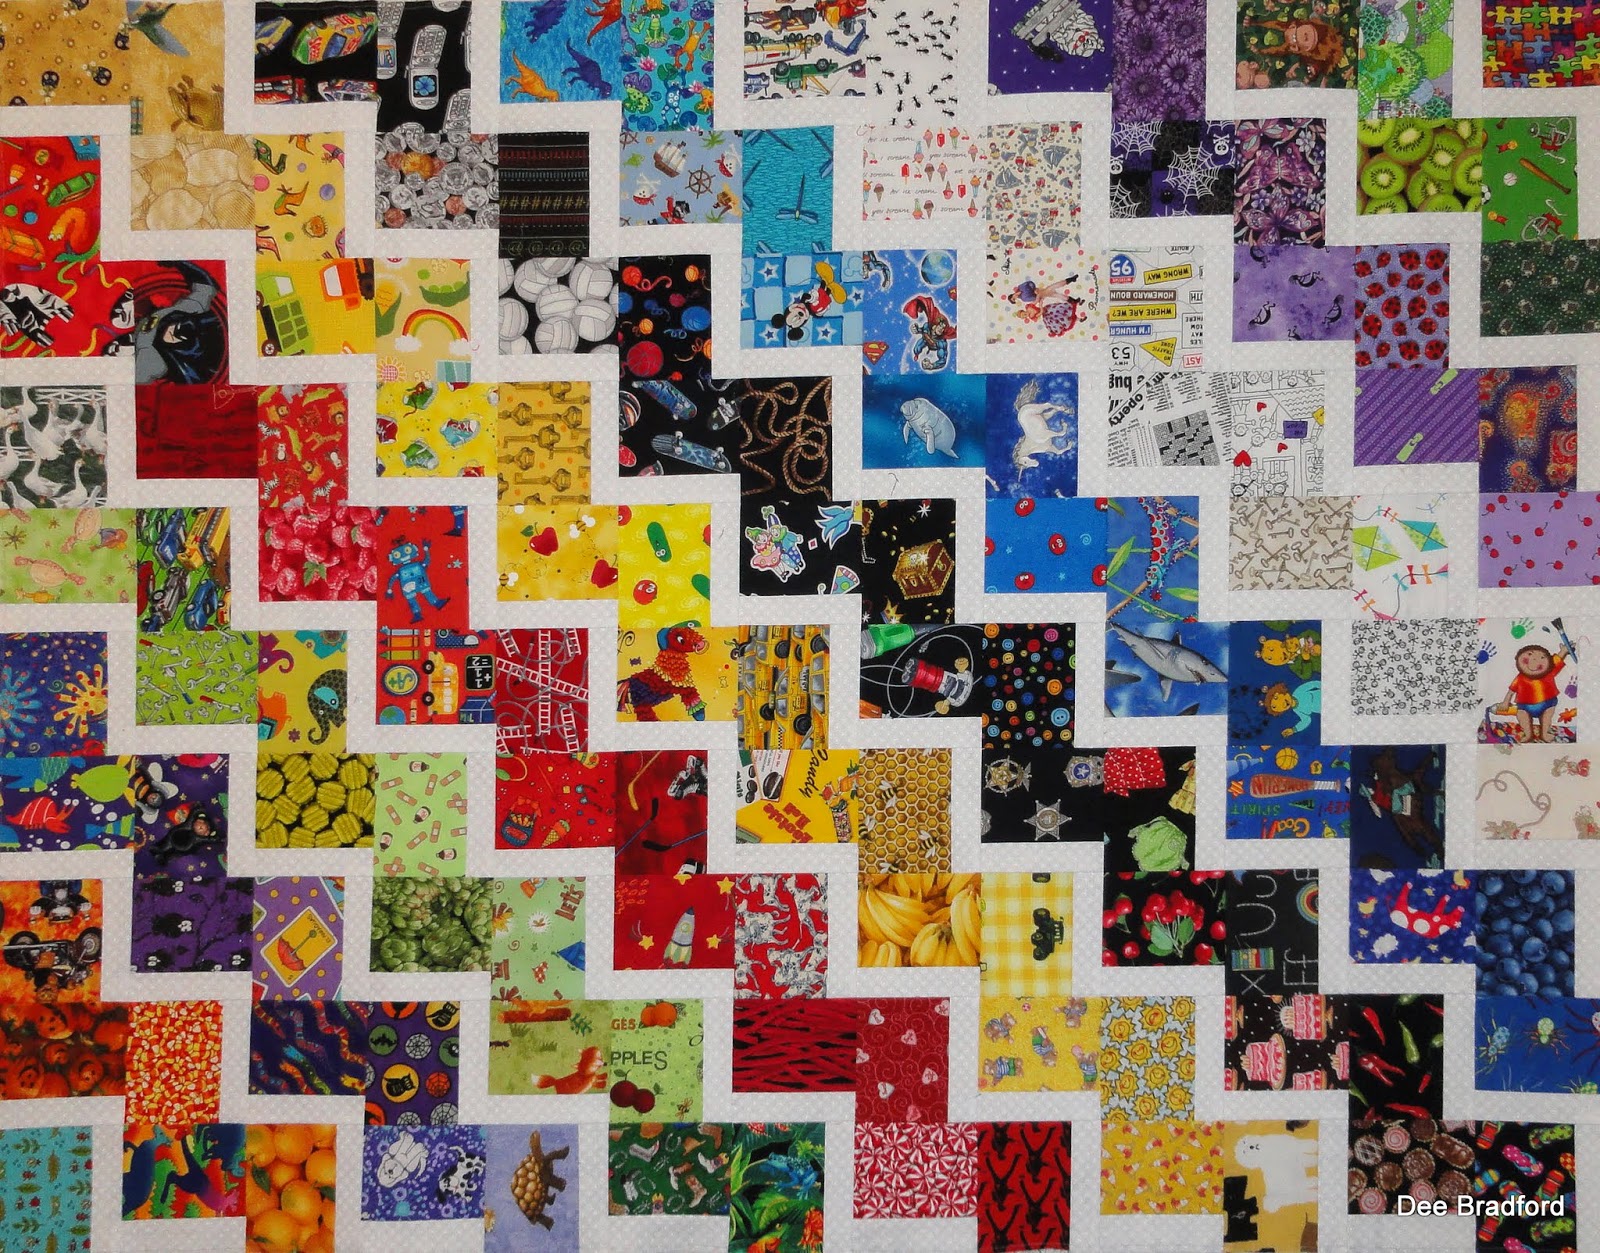
Very fun and very easy Color Stair Steps (inspired by a Me & My Sister Pattern).  I used some of my pre-cut 4.5" squares but trimmed off an inch to add the white sashing on one edge.  I hated throwing them away  but 1" really isn't enough to save in my world.  And I didn't want to cut a bunch of new rectangles, so in the interest of saving time I just trimmed what I had.  I'm coming to the conclusion that I like white with the novelties, maybe even better than black.  Gasp.  There for a while I was using so much black Moda marble I should have bought a bolt.  I've used white TOT or small speckles (when I can find them) and like how they make the colors sparkle.  The white stripes in this quilt are only 3/4" finished.


HST Chevron
This last chevron quilt uses large half square triangles with a center black strip.  Initially it was 3/4" finished but visually that was too large so I cut them down.  I've been neglecting my white novelties since I've been doing so many quilts with white sashing so this allowed me to use some of them without impacting the pattern.  This also stretched my OCD a little as the points on the black strips are clipped but I'm sure it only bothers me.  The pattern was fast, but I do have a bunch of large triangles now, waiting to be used in another pattern.  The original idea came from an on-line pattern from staff of Material Girls Quilt Shop.


Phew, lots of pictures in this post.  I've put sticky notes in my scrap book to mark which quilts I've not included on the blog yet and today a bunch can come off.  Hope you enjoyed.  Now you know why I got so excited about finding 3 new orange fabrics.  Still need to find some purples and oranges that don't have a Halloween theme.  The hunt is on.

Saturday, February 7, 2015

It Always Happens

I've noticed something about myself.  I make a bunch of I Spy quilts, use up a good amount of fabric.  I'm so proud of myself, using my stash.  Look, the baskets are easier to put things away.  I don't have to push quite so hard to squeeze the fabric back in.  I tell myself what a good girl I am.

And then what happens?  I go shopping.  I don't ever seem to buy fabric and then start sewing.   It always seems to be the reverse.  I go on a sewing spree, and then a shopping spree.  Why?  I don't know exactly.   Maybe I'm excited because I'm sewing and having fun.  As I'm sewing I think gee wouldn't it be nice to have more orange or red fabric for the next quilt.  Or wow, I'm almost completely out of bananas or zebras, I can't run out of zebras!  Then I find myself in one (or more) of my lovely LQS's and see something I've not seen before.

It happened today.  Out running errands with my dear husband, on our way to Cabela's and he asks if I'd like to stop by a fabric store while we're out.  What a sweetheart.  Of course we are going to Cabela's for him.  Oh well, since we're in the area and I haven't stopped in for a couple of months, I'll take a look.  Seriously, I thought I'd just pop in, probably not see anything new and we'd be on our way.  Silly Silly Silly!

I found several oranges and reds, a couple of yellows.  And aren't those toucans just too cute.  I don't have any toucans in my stash.  Or I didn't.  And the ABC fabric will make a great (and appropriate) border.  I've got that snake fabric in red already but I really do want more oranges.  They add a great splash mixed in with all the blues and blacks.


I love the red cars and the balls.  Not sure how many kids will be able to identify darts, but that's ok.  Every quilt needs at least a couple of areas of red.

Did I mention I'm getting low on Zebras?  And cars.  Seriously I am getting very low on cars.  Love the small scale, they will work well in patterns where I need small scattered prints.  The rockets are great too.  R for Rockets.  The letter R is harder than you'd think.  Raccoons and Roosters are good, but I like the Rockets a lot.  And they are on yellow, definitely can use a few more yellow fabrics.
As I'm standing at the cutting counter, I turn around and see a southwestern themed display.  I've been looking for pistol fabric for years, ever since my husband wanted me to make a quilt for a friend from his air gun club.  And look there!  Pistols and rifles.  How about that?  And I live in Texas so everyone wants horses and cowboys.  Aren't those bucking broncos wonderful!  And I've never seen branding iron fabric!  And bonus, I've been looking for a 4.5" wide ruler and they had one of those too.  My frequent buyer card is all full!

 
As soon as we got home all the fabric went in the washing machine.  I've now cut a strip off the short end of each fabric using my brand new ruler and made 4.5" squares. They are filed away in my trusty Art Bin, the fabric folded and put in my wire baskets.  Baskets that are pretty full again.  Once again I've used a bunch of my novelty stash and then within an hour restocked completely.  Probably more than the 4 quilts that I've made in the past few weeks used up.  Ah well, I know they won't go to waste.  There will be more kids and more quilts down the road.  What a fun day.

One Thing Leads to Another

One of the reasons I finally started this blog (after many years of suggestions from quilting friends) is that I was in a quilting funk.  I just wasn't excited about anything, even though I have a lovely new quilting room.  I thought if I started reviewing old quilts that I might get inspired.  And I did.

As I was going through the recent post on fun with triangles I realized I hadn't used that new method of making corner triangles on any of the patterns that use 4.5" blocks (leaning stars for example).  I wanted to make a quilt for a little 3 year old red haired cutie whose mom sits near me at work.  She (the little girl) loves animals, purple, and dancing.  I knew I wanted to pack in as many girly fabrics and animals as possible and so the 4.5" pre-cuts would be a good choice.  I'd also seen a version of this quilt shown at the right, made with sashing.  It really emphasized the X configuration and I wanted to try it.


I decided to track how much time it takes to make this quilt.  Folks frequently ask me how long it takes to make my quilts but I've been bad at making notes.  So here was an opportunity.  The results?  Just picking out the fabrics took an hour, including pulling the pre-cut squares.  Cutting the background triangles and the additional squares took another 30 minutes.  This would have been longer except that about 75% of the squares were pre-cut.  Marking the sewing lines using the Perfect Corner Ruler took 30 minutes, sewing the triangles took an hour, pressing and trimming the squares took 30 min.  Deciding on the exact layout added another 30, so I'm up to 4 hours at this point.  
Preliminary Layout

Deciding the layout took some extra time on this one.  Initially I was going to do a random layout similar to the quilt above.  I sewed all the corner triangles on, trimmed the blocks, then put it back up on the design wall.  Standing in the doorway to my sewing room I decided I really wasn't excited about the random arrangement.  It just seemed kind of spotty with the small 4" squares.


2nd Layout
What to do?  At that point it was late, so I went to bed to sleep on it.  As I was trying to go to sleep I thought, Aha, how about grouping the colors?  I done this on several other quilts lately (future post on those later).  The larger blocks of color unify the quilt and give more emphasis to the pattern and this quilt needed something.  I almost jumped up to go back to the room and try it, but restrained myself until morning.  It was very late.  The next day I re-arranged and really liked the result.  Even better I didn't have to replace any of the squares.  They fit into color groups of 4 pretty well.


As frequently happens, one idea leads to another.  I was looking at the blocs on the design wall and remembered seeing a quilt several years ago with X's and O's.  I flipped a few squares and Viola!  Hugs and Kisses.  Definitely something the little girl will like.  She's almost 4 years old so I wanted the quilt to be larger than my usual baby quilt size.  I added the extra precut squares that I had pulled at first but didn't need for the center of the quilt.  Fortunately I hadn't put them away yet.  I love how this turned out and it used a bunch of precut squares.  Oh and the grand total time spent (before quilting) was between 7 & 8 hours (I forgot to note my start time a couple of evenings).  Those pre-cut squares save so much time, both time to cut and time to re-fold and put away the fabrics.  Quilting and binding typically take about an hour each, so my previous estimates of 10 hours is about right.
Hugs and Kisses Color Block
I can't wait to give this one away.  It's turned out so well and I'm sure the little girl is going to love it.  It has lots and lots of animals, including a unicorn.  It even has her name (Georgia) and where she lives (Texas).  Hopefully I'll have a picture of her playing with it soon.